
door closer installation manual
Door closers ensure smooth, automated door operation, enhancing security, accessibility, and energy efficiency. Proper installation is critical for functionality, safety, and longevity, requiring precise tools and adherence to manufacturer guidelines.
Overview of Door Closers and Their Importance
Door closers are essential devices that automatically close doors, ensuring security, accessibility, and energy efficiency. They are vital for maintaining building integrity, preventing unauthorized access, and reducing heat loss. Door closers also promote hands-free operation, enhancing convenience and hygiene. Their importance lies in their ability to handle various door sizes and weights, from light interior doors to heavy-duty exterior ones. Properly installed closers ensure doors function smoothly, reducing wear and tear while meeting accessibility standards for all users, including those with disabilities. They are a critical component in modern door systems.
Understanding the Components of a Door Closer
A door closer consists of several key components, including the main arm, forearm, and spring. The main arm connects to the doorframe, while the forearm attaches to the door, ensuring smooth closure. The spring powers the mechanism, with adjustable valves controlling closing speed and latch speed. Additional parts like arm shoes and mounting brackets provide stability and alignment. Proper understanding and assembly of these components are crucial for effective installation and functionality, ensuring the door closes securely and operates as intended.

Tools and Materials Required
Essential tools include a drill, screwdrivers, and measuring tape. Materials needed are screws, mounting brackets, and arm shoes. Ensure all components are compatible with the door closer model for proper installation.

Essential Tools for Installation
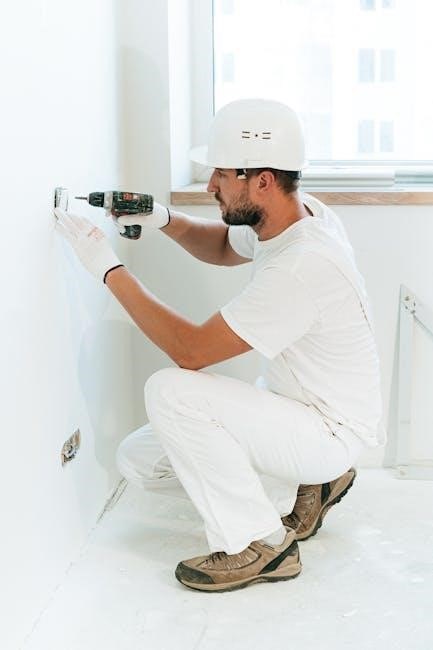
The installation process requires specific tools to ensure accuracy and efficiency. A drill is necessary for creating pilot holes, while screwdrivers (both flathead and Phillips) are needed for securing components. A measuring tape helps in marking precise locations, and allen wrenches or hex keys may be required for adjusting certain parts. Additionally, clamps can assist in holding the door closer in place during mounting. Having these tools readily available ensures a smooth and professional installation. Always refer to the manufacturer’s manual for specific tool recommendations tailored to your door closer model.
Mandatory Safety Equipment
Ensuring safety is paramount during door closer installation. Always wear protective gloves to prevent cuts and abrasions, and use safety glasses to shield your eyes from debris. A dust mask is essential when drilling to avoid inhaling dust particles. Additionally, steel-toe boots provide protection from heavy tools or falling objects. Properly secure the door with clamps to prevent accidental movement, which could cause injury. Using a sturdy ladder or step stool, if needed, ensures stability while working at heights. Always maintain a clean workspace to minimize tripping hazards and ensure smooth installation.

Preparation Steps
Assess door weight and size, use templates for accurate measurements, mark holes precisely, and ensure proper alignment with the door frame and hinges for smooth functionality.
Measuring and Marking the Door and Frame
Begin by assessing the door’s hand orientation and weight; Use the provided template to determine hole locations for the closer and arm shoe. Mark four holes on the door for the closer body and two on the frame for the parallel bracket. Ensure measurements align with the hinge line and striker plate. Drill pilot holes to avoid splitting materials. Double-check all markings for accuracy to ensure proper alignment and functionality. Precise measurements are critical for a secure and efficient installation, preventing future adjustments or repairs.
Understanding Door Weight and Size Recommendations
Door closers are designed to handle specific weight ranges, typically between 65kg and 85kg. Selecting the correct closer ensures proper functionality and longevity. Measure the door’s width, height, and thickness to determine the appropriate closer size. Heavier doors require stronger springs, while lighter doors need less force. Misjudging weight or size can lead to poor performance or damage. Always consult the manufacturer’s specifications for weight and size compatibility. Proper selection guarantees smooth operation, safety, and energy efficiency, while preventing potential repairs or replacements down the line. Accurate sizing is essential for optimal door closer performance.

Installation Process
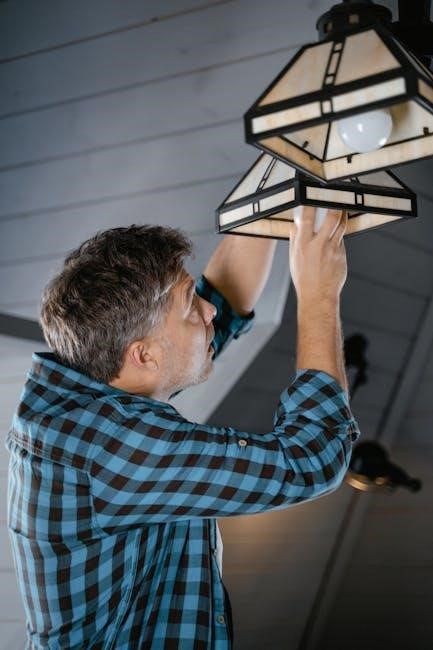
Mount the door closer on the door, aligning it with pre-marked holes. Secure it with screws, then attach the main arm and forearm. Adjust the closer’s settings for proper door alignment and smooth operation. Ensure all components are tightly fastened and properly aligned to guarantee reliable functionality. Follow manufacturer instructions for precise installation steps and adjustments. Proper installation ensures safety, efficiency, and longevity of the door closer system. Always test the door after installation to confirm it operates correctly and meets safety standards.
Mounting the Door Closer on the Door
Begin by marking the door according to the manufacturer’s template. Drill pilot holes for the closer’s screws. Mount the door closer using the provided screws, ensuring it is securely fastened. Position the closer so the adjustment valves face the hinge side. Verify alignment with the door’s hinge line for proper operation. Tighten all screws firmly to prevent loosening over time. Double-check the installation to ensure the closer is level and evenly spaced. Proper mounting is essential for the door closer to function effectively and maintain consistent performance. Follow the manufacturer’s specific instructions for accurate placement and alignment.

Attaching the Main Arm and Forearm
Attach the main arm to the door closer’s top pinion shaft using the provided screw. Ensure it is securely fastened and aligned properly. Next, connect the forearm to the main arm by removing the forearm screw and assembling it according to the manufacturer’s instructions. Attach the forearm to the door frame, ensuring it aligns with the pre-drilled holes. Tighten all screws firmly to secure the assembly. Adjust the forearm’s length to ensure proper alignment with the door closer’s operation. Proper attachment of the main arm and forearm ensures smooth door closure and optimal functionality. Follow the manufacturer’s guidelines for precise alignment and secure fastening.

Adjustment and Fine-Tuning
Adjust the closing speed and latch speed using the valves on the door closer. Ensure proper alignment and smooth operation by fine-tuning these settings as needed.
Setting the Closing Speed and Latch Speed
Adjust the closing speed by turning the valve located on the door closer, typically positioned toward the hinge edge. Clockwise rotation increases speed, while counterclockwise decreases it. The latch speed, often controlled by a separate valve, ensures the door closes securely into the frame. Fine-tune these settings to achieve smooth operation, ensuring the door closes efficiently without slamming. Test the door repeatedly after adjustments to confirm proper functionality and safety. Proper alignment and adjustment are crucial for optimal performance and longevity of the door closer system.
Testing and Ensuring Proper Functionality
After adjustments, test the door by opening it fully and allowing it to close naturally. Ensure the door closes smoothly, latches securely, and does not slam. Check the alignment of the latch bolt with the striker plate to confirm proper engagement. Repeat the test several times to verify consistent performance. Observe the door’s behavior throughout its entire range of motion, ensuring there are no obstructions or uneven movement. Proper functionality ensures safety, accessibility, and longevity of the door and closer system, meeting both user needs and regulatory standards.
Safety Considerations
Ensure proper installation and adjustment to prevent injuries or damage. Always wear safety gear and follow manual guidelines to avoid misapplication or misadjustment of the door closer.
Avoiding Common Installation Mistakes
To ensure proper functionality, avoid common errors such as incorrect positioning of adjustment valves, misaligning the door closer with hinges, or using inadequate screws. Improper drilling or failing to follow templates can lead to weak mounting. Additionally, neglecting to test the door’s closing and latching action post-installation can result in poor performance. Always double-check measurements and ensure the closer is suitable for the door’s weight and size. Following the manufacturer’s instructions precisely minimizes risks and ensures reliability.
Ensuring Accessibility for All Users
Accessibility is crucial for all users, including children, the elderly, and individuals with disabilities. Install door closers with adjustable closing speeds to accommodate varying needs. Ensure the door’s opening force complies with accessibility standards. Positioning the closer correctly prevents the door from being too heavy to open or close. Additionally, regular maintenance ensures smooth operation, making it easier for everyone to use the door. Compliance with local accessibility regulations guarantees inclusivity and usability for all individuals, promoting safety and convenience in public and private spaces alike.

Maintenance and Troubleshooting
Regular lubrication of moving parts ensures smooth operation. Inspect door alignment and tighten loose screws to maintain functionality. Addressing issues promptly prevents major repairs and extends lifespan.
Regular Maintenance Tips
Regular lubrication of moving parts, such as hinges and pins, ensures smooth operation. Check door alignment and tighten screws if necessary. Inspect springs for tension and adjust closing valves as needed. Clean the closer to remove dirt or grease buildup. Replace worn-out parts promptly to prevent malfunction. Schedule annual inspections to maintain optimal performance. Always refer to the manufacturer’s guidelines for specific maintenance recommendations. Proper upkeep extends the lifespan of the door closer and ensures reliable functionality over time. Regular checks also help prevent unexpected repairs and maintain user safety.
Identifying and Fixing Common Issues
Common issues with door closers include improper closing, uneven alignment, or excessive noise. Check if the door closer is securely mounted and aligned with the frame. Adjust the closing speed valves to ensure smooth operation. Lubricate moving parts if squeaking occurs. Inspect for loose screws or worn components, such as the main arm or spring, and replace them if necessary; Ensure proper door weight and size compatibility. Refer to the manufacturer’s troubleshooting guide for specific solutions. Addressing these issues promptly prevents further damage and ensures consistent performance. Regular inspections can help identify potential problems early.