
pro t721 thermostat installation manual
The Pro T721 Thermostat is a smart, efficient solution for home automation, offering compatibility with various HVAC systems and a user-friendly interface for temperature control and energy management.
Overview of the Pro T721 Thermostat
The Pro T721 Thermostat is a versatile and energy-efficient device designed for seamless integration with HVAC systems. It features a universal sub-base for easy installation on walls or junction boxes and supports both battery and 24V power options. With a compact design and backlit display, it offers intuitive temperature control. The thermostat is ideal for smart home upgrades, ensuring consistent comfort while optimizing energy usage. Its 5-year warranty and user-friendly interface make it a reliable choice for homeowners seeking advanced climate management solutions.
Importance of Proper Installation
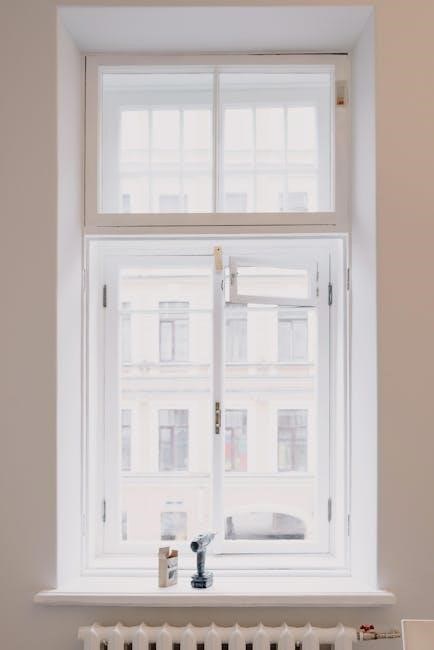
Proper installation of the Pro T721 Thermostat is crucial for optimal performance and efficiency. It ensures accurate temperature readings and consistent heating or cooling. Incorrect installation can lead to poor system performance, increased energy bills, and potential damage to the HVAC system. Following the installation manual closely guarantees safety, reliability, and adherence to warranty terms. Correct wiring, leveling, and placement (4-5 feet above the floor in an area with average temperature and good air circulation) are essential for precise operation and long-term functionality.

System Requirements and Compatibility
The Pro T721 Thermostat is compatible with standard HVAC systems, including gas, oil, and electric furnaces, as well as heat pumps, making it a versatile solution for various home setups.
Compatibility with HVAC Systems
The Pro T721 Thermostat is universally compatible with most HVAC systems, including gas, oil, and electric furnaces, as well as heat pumps. It supports multi-stage heating and cooling systems, making it suitable for both residential and light commercial applications. The thermostat works seamlessly with forced air and hydronic systems, ensuring precise temperature control. Its compatibility extends to both conventional and heat pump configurations, providing flexibility for various installation scenarios. This versatility makes the Pro T721 an ideal choice for upgrading or replacing existing thermostats in diverse HVAC setups.
Power Supply and Wiring Requirements
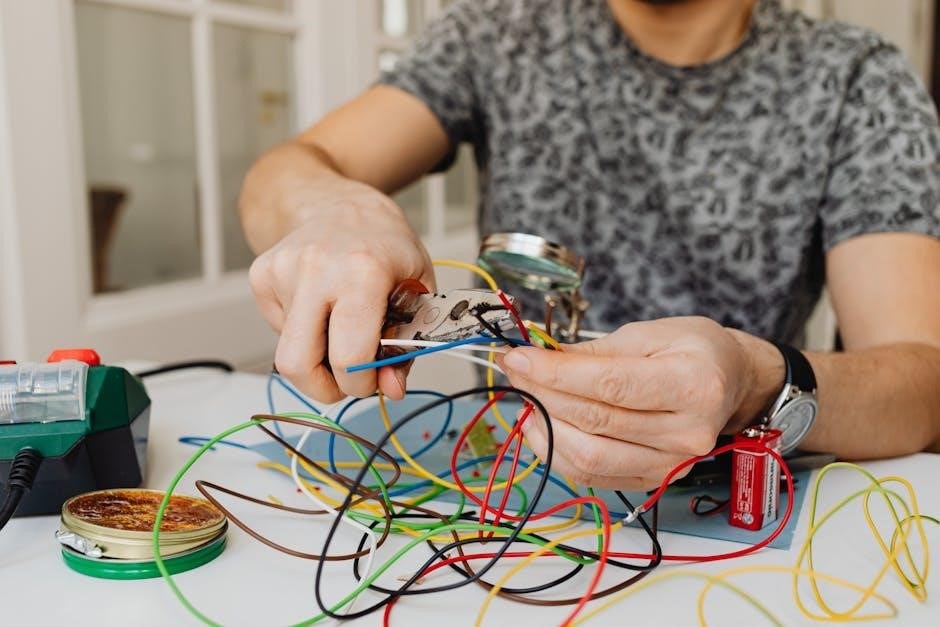
The Pro T721 Thermostat requires a 24V power supply and is compatible with most standard wiring configurations. It can be hardwired or optionally powered by AA batteries if a C terminal connection is not available. The thermostat supports systems with or without a common wire, providing flexibility for various installations. Proper wiring involves connecting terminals like O, B, and C for heat pump or conventional systems. Ensure all connections are secure to avoid malfunctions. The universal sub-base allows mounting on a wall or junction box, simplifying installation across different setups.
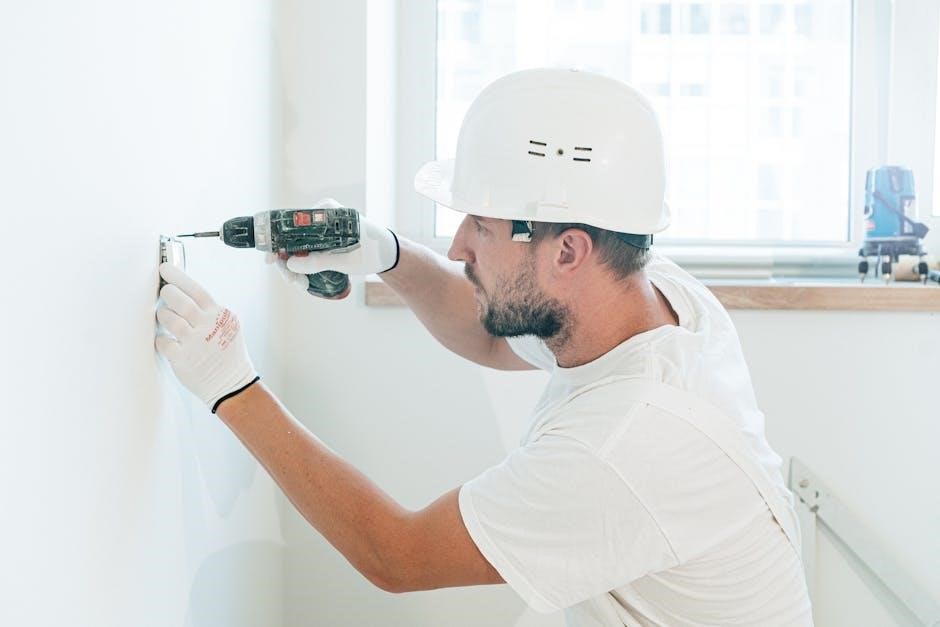
Tools and Materials Needed
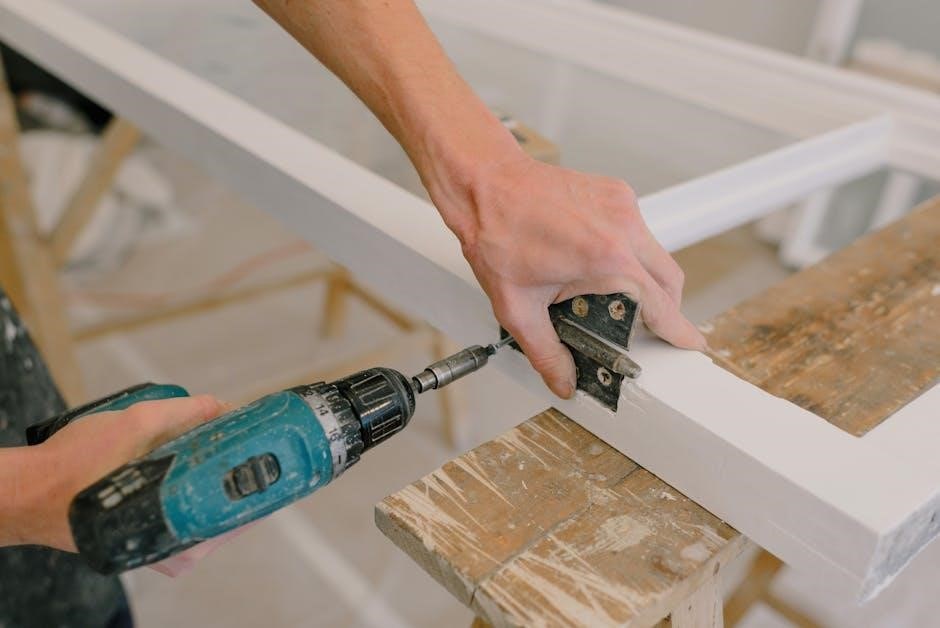
Install the Pro T721 Thermostat using essential tools like a drill, screwdriver, pliers, and voltage tester. Materials include wall anchors, screws, and wiring connectors for secure mounting and connections.

Essential Tools for Installation
For a successful Pro T721 Thermostat installation, gather essential tools: a drill, screwdriver, pliers, voltage tester, and wire strippers. These tools ensure safe and proper wiring connections. A ladder may also be needed for reaching the installation area. Ensure all devices are turned off before starting to avoid electrical hazards. Having these tools ready will streamline the process and prevent delays. Proper preparation is key to a smooth and efficient installation experience.
Required Materials for Mounting
For mounting the Pro T721 Thermostat, ensure you have the necessary materials. The thermostat comes with a universal sub-base that mounts on the wall or junction box. Wall screws and plastic anchors are typically included for secure installation. If using a junction box, verify compatibility and ensure it is properly secured. Additional materials like a leveling tool or extra screws may be needed, depending on your wall type. These materials ensure a stable and level installation, which is crucial for accurate temperature sensing and proper thermostat operation.
Installation Steps
Begin by turning off the power to your HVAC system. Remove the old thermostat and disconnect the wires. Mount the new Pro T721 thermostat securely, ensuring proper alignment. Connect the wires according to the wiring diagram provided in the manual. Turn the power back on and test the thermostat to ensure it operates correctly. Follow all safety precautions and manufacturer guidelines during the process to avoid any potential issues or damage.
Connecting the Wiring
Connect the wires to the Pro T721 thermostat according to the wiring diagram in the manual. Ensure the power is off before starting. Identify the terminals (C, O, B, etc.) and match them to your system. Use the provided wiring labels for clarity. Securely attach the wires to the thermostat’s terminal block. Double-check connections to avoid errors. If your system requires a common wire (C), ensure it is properly connected. Refer to the manual for specific wiring configurations, especially for heat pumps or dual-fuel systems. Proper wiring ensures safe and efficient thermostat operation. Always follow safety guidelines during this process.
Finalizing the Installation
After connecting the wires, secure the Pro T721 thermostat to the sub-base using the provided screws. Tighten firmly to ensure stability. Restore power to the HVAC system and test all modes (heat, cool, etc.) to confirm proper operation. Ensure the thermostat is installed 4-5 feet above the floor in an area with average temperature and good air circulation. Avoid placing it near hot spots or drafts. Once installed, check for any loose connections and ensure the display is functioning correctly. Dispose of packaging materials responsibly and refer to the manual for any additional setup instructions.
Post-Installation Setup
After installation, configure the thermostat settings such as date, time, and temperature preferences. Register the warranty within 60 days for coverage. Refer to the manual.
Configuring the Thermostat Settings
After installation, configure the Pro T721 Thermostat by setting the date, time, and preferred temperature levels. Choose between heat, cool, or auto modes to suit your HVAC system. Use the +/- keys to adjust settings. Refer to the manual for advanced features like scheduling and energy-saving modes. Ensure proper temperature calibration for accurate control. The thermostat also allows customization of display settings and language preferences.
Testing the Thermostat Operation
After installation, test the Pro T721 Thermostat by checking its display and ensuring it responds to temperature changes. Verify that heating, cooling, or fan modes activate correctly. Test the low battery indicator by simulating a low battery scenario. Ensure proper communication with your HVAC system and confirm that the thermostat maintains the set temperature. Refer to the manual for specific test procedures to validate all features, including scheduling and energy-saving modes, to ensure optimal performance and reliability.
Maintenance and Troubleshooting
Regularly replace batteries when the low battery indicator appears. Ensure proper thermostat mounting and check for loose connections. Clean the sensor and verify display accuracy for optimal performance.
Regular Maintenance Tips
Replace AA batteries promptly when the low battery indicator appears to maintain functionality. Ensure the thermostat is mounted 4-5 feet above the floor in an area with good air circulation. Clean the sensor regularly to ensure accurate temperature readings. Check wiring connections for looseness and verify display accuracy. Registration within 60 days of installation is required for the 5-year warranty. Refer to the operating manual for detailed instructions and troubleshooting guides. Regular maintenance ensures optimal performance and extends the lifespan of your Pro T721 Thermostat.
Common Issues and Solutions
Common issues with the Pro T721 Thermostat include low battery warnings, incorrect temperature readings, and display malfunctions. Replace batteries promptly when the low battery indicator appears. Ensure the sensor is clean and the thermostat is mounted 4-5 feet above the floor in a well-ventilated area to maintain accurate temperature control. For display issues, restart the thermostat or check wiring connections. Regular maintenance, such as cleaning the sensor and verifying proper installation, can prevent many of these problems and ensure optimal performance.
Warranty and Support
The Pro T721 Thermostat includes a 5-year limited warranty. Registration is required within 60 days of installation. For assistance, contact toll-free at 888-776-1427 or visit www.pro1iaq.com.
Understanding the Warranty Terms
The Pro T721 Thermostat is backed by a 5-year limited warranty, covering repairs or replacements for manufacturing defects. Registration within 60 days of installation is mandatory for warranty activation. The warranty applies to defects in materials and workmanship under normal use and proper installation. Misuse, tampering, or unauthorized modifications may void the warranty. For full coverage, ensure the thermostat is installed and maintained according to the official installation manual. Detailed terms and conditions are available on the Pro1 website or through customer support.
Accessing Customer Support
For assistance with the Pro T721 Thermostat, customers can contact Pro1’s toll-free support line at 888-776-1427, available Monday through Friday from 9 AM to 6 PM Eastern Time. Additional resources, including installation manuals and troubleshooting guides, are accessible on the official website at www.pro1iaq.com. Support is available to address installation inquiries, operational issues, and warranty-related questions, ensuring a seamless experience for users. Representatives are trained to provide solutions for both technical and general concerns, helping customers maximize their thermostat’s performance and efficiency.